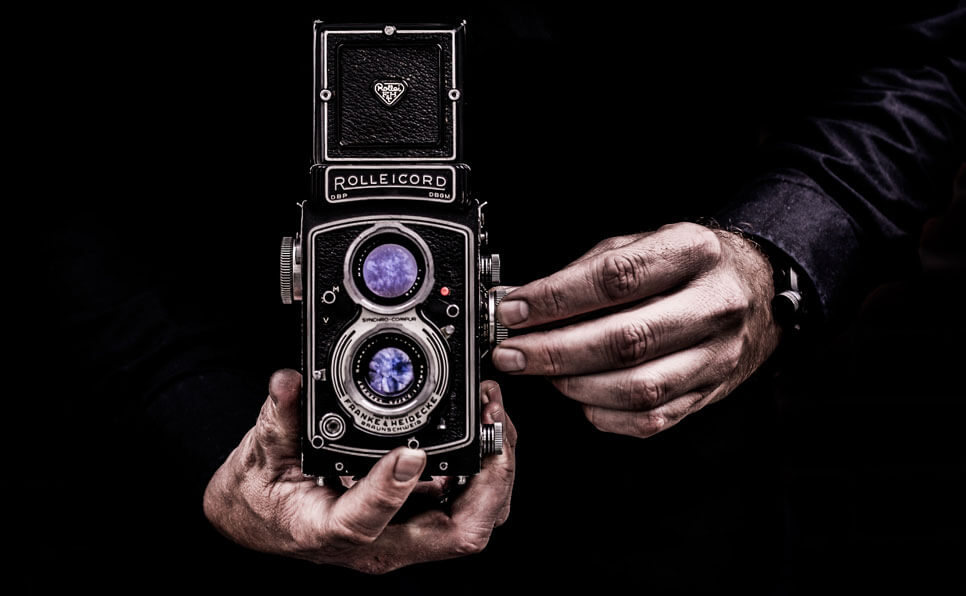
Forget flat, uninspired images: in university photography studios, mastering three-point lighting unlocks professional-grade results. We move beyond basic setups by exploring how to sculpt light, creating depth and mood in your portraits. From understanding the nuanced interplay of key, fill. Back lights, to leveraging advancements in LED technology for color accuracy and energy efficiency, you’ll learn to control light like a seasoned pro. Discover how to adapt classic techniques to contemporary trends like ‘Rembrandt lighting’ for dramatic portraits and explore how to use diffusers and reflectors to modify light quality, ultimately transforming your studio practice.

Understanding the Core: Key Light, Fill Light. Back Light
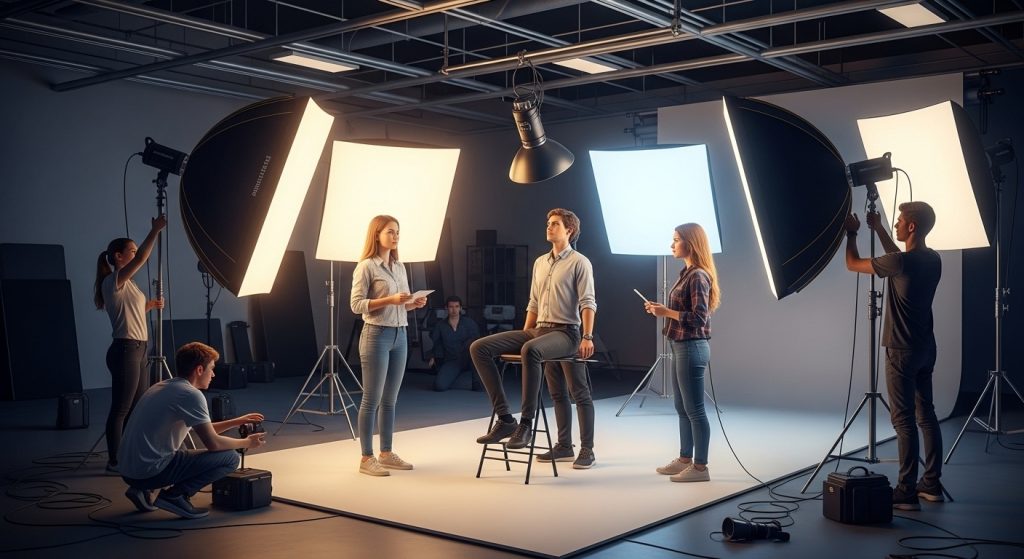
At the heart of professional photography, especially in a controlled environment like a university studio, lies the three-point lighting setup. This foundational technique involves strategically positioning three light sources to illuminate a subject effectively, creating depth, dimension. Visual interest. Each light serves a distinct purpose:
- Key Light: This is your primary light source, the brightest of the three. It defines the overall shape and form of your subject, casting the most prominent shadows. Placement is crucial; experiment with angles to achieve the desired mood and emphasis. A key light positioned to the side creates more dramatic shadows than one placed directly in front.
- Fill Light: As the name suggests, the fill light softens the shadows created by the key light. It’s typically placed on the opposite side of the key light, at a lower intensity. The fill light ensures that shadows are not too harsh, revealing details that would otherwise be lost in darkness. Reflectors can also be used as a fill light, bouncing the key light back onto the subject.
- Back Light (or Hair Light/Rim Light): Positioned behind the subject, the back light separates the subject from the background, adding a subtle halo or rim of light. This creates a sense of depth and prevents the subject from blending into the background. The back light is often the least intense of the three.
Mastering the interplay between these three lights is essential for achieving professional-looking results in studio photography.
Equipment Essentials for Your University Studio
Before diving into specific setups, it’s essential to ensure you have the necessary equipment. While specific brands and models may vary depending on your university’s resources, here’s a list of essential items:
- Studio Strobes or Continuous Lights: Strobes (flash units) provide powerful bursts of light, ideal for freezing motion and overpowering ambient light. Continuous lights (LED panels, tungsten lights) offer the advantage of seeing the lighting effect in real-time, making them easier to learn with.
- Light Stands: Sturdy light stands are crucial for positioning your lights securely. Look for stands that offer adjustable height and a stable base.
- Light Modifiers: These shape and control the light output. Common modifiers include:
- Softboxes: Create soft, diffused light, ideal for portraits.
- Umbrellas: Similar to softboxes. Often more affordable and easier to set up.
- Reflectors: Bounce light back onto the subject, filling in shadows.
- Barn Doors: Shape the light beam and prevent light spill.
- Snoots: Create a focused beam of light, useful for highlighting specific areas.
- Triggers and Receivers (for Strobes): These wirelessly synchronize your strobes with your camera.
- Light Meter (Optional): A light meter provides precise measurements of light intensity, helping you achieve accurate exposures. While not strictly necessary with digital cameras (you can use the histogram), a light meter can speed up your workflow and improve consistency.
- Backgrounds: Seamless paper or fabric backdrops provide a clean and distraction-free background for your photographs.
Setting Up Your Three-Point Lighting: A Step-by-Step Guide
Here’s a practical guide to setting up a basic three-point lighting arrangement in your university photography studio. This setup is a great starting point for portrait photography and can be adapted for other subjects.
- Position Your Subject: Place your subject in the center of your shooting area, in front of your chosen background.
- Place the Key Light: Position the key light to one side of your subject, typically at a 45-degree angle. Adjust the height so that the light is slightly above eye level. Observe the shadows it creates on your subject’s face.
- Add the Fill Light: Position the fill light on the opposite side of the key light, also at a 45-degree angle. The fill light should be less intense than the key light. Adjust the distance or power of the fill light to control the shadow density. A good starting point is to set the fill light about one stop dimmer than the key light.
- Place the Back Light: Position the back light behind your subject, aimed at their shoulders and head. Be careful not to let the back light shine directly into the camera lens. Adjust the position and intensity of the back light to create a subtle rim of light around your subject.
- Adjust and Refine: Take test shots and carefully evaluate the lighting. Adjust the position, angle. Intensity of each light until you achieve the desired effect. Pay attention to the shadows, highlights. Overall balance of the light.
Troubleshooting Common Three-Point Lighting Issues
Even with careful planning, you may encounter challenges when using three-point lighting. Here are some common issues and how to address them:
- Harsh Shadows: If the shadows are too dark and defined, increase the intensity of the fill light or move it closer to the subject. You can also use a larger light modifier on the key light to soften the light.
- Lack of Depth: If the subject appears flat, ensure the back light is creating a visible rim of light around the subject. You can also increase the contrast between the key light and fill light.
- Light Spill: Stray light can cause unwanted highlights and reduce contrast. Use barn doors or flags to control the light beam and prevent light from spilling onto the background or into the camera lens.
- Unnatural Skin Tones: Incorrect white balance can result in unnatural skin tones. Use a gray card to set the white balance in your camera or adjust the white balance in post-processing.
Beyond the Basics: Creative Three-Point Lighting Techniques
Once you’ve mastered the basic three-point lighting setup, you can start experimenting with more creative techniques to achieve different moods and effects. Here are a few ideas:
- High-Key Lighting: This technique uses bright, even lighting to create a cheerful and optimistic mood. Use a bright key light, a strong fill light. A subtle back light. The background should also be bright and evenly lit.
- Low-Key Lighting: This technique uses dark, dramatic lighting to create a sense of mystery or drama. Use a strong key light, a minimal fill light. A subtle back light. The background should be dark and shadowed.
- Rembrandt Lighting: This classic lighting technique creates a small triangle of light on the subject’s cheek, opposite the key light. This is achieved by positioning the key light at a 45-degree angle and slightly above eye level.
- Using Gels: Colored gels can be placed over the lights to create dramatic and artistic effects. Experiment with different colors to see what works best for your subject and the desired mood.
Real-World Applications: Three-Point Lighting in Action
The three-point lighting setup is a versatile technique used in various photography genres. Here are a few real-world applications:
- Portrait Photography: Three-point lighting is a staple in portrait photography, allowing photographers to sculpt the subject’s face and create flattering light.
- Product Photography: Three-point lighting can be used to highlight the features of a product and create visually appealing images for e-commerce or advertising.
- Video Production: Three-point lighting is also essential in video production, ensuring that the subject is well-lit and the scene has depth and dimension. Many university film programs rely on this fundamental technique.
- Fashion Photography: Fashion photography often utilizes variations of three-point lighting to create dramatic and stylized images.
Comparing Lighting Options: Strobes vs. Continuous Lights
Choosing between strobes and continuous lights for your university photography studio depends on your specific needs and budget. Here’s a comparison of the two:
| Feature | Strobes (Flash) | Continuous Lights (LED, Tungsten) |
|---|---|---|
| Light Output | High power, ideal for overpowering ambient light | Lower power, may struggle in bright environments |
| Color Accuracy | Typically more color accurate | Can vary depending on the type of light |
| Freezing Motion | Excellent at freezing motion | Less effective at freezing motion |
| Ease of Use | Requires triggers and receivers, can be more complex to learn | Easier to see the lighting effect in real-time, simpler to use |
| Cost | Can be more expensive upfront | Generally more affordable |
| Heat | Produce minimal heat | Can generate significant heat, especially tungsten lights |
Ultimately, the best choice depends on your specific needs and preferences. Strobes offer more power and control, while continuous lights are easier to use and more affordable. Many university photography programs utilize a combination of both to cater to different needs.
Conclusion
Mastering three-point lighting isn’t just about mimicking a setup; it’s about understanding light’s behavior and sculpting your subject. Experiment beyond the standard key, fill. Back lights. I remember once, struggling to capture the texture of a sculpture. By bouncing the key light off a white reflector positioned low, I was able to enhance the subtle details. Consider how current trends in portraiture, like using continuous LED panels for softer, more natural-looking light, can be adapted to your studio work. Don’t be afraid to break the rules! Ultimately, the goal is to tell a story, to evoke emotion. Each adjustment, each modifier, influences the final image. So, go back to the studio, try something new. Most importantly, have fun. The more you experiment, the more intuitive lighting becomes. Embrace the learning process. You’ll find yourself creating images that truly shine.
More Articles
Crafting Compelling Statements: How to Make Your Application Truly Stand Out
Decoding University Admissions: Understanding Key Criteria for a Successful Application
Conquer Exam Stress: Practical Techniques for Staying Calm and Focused
Ace Your Entrance Exam: Proven Study Habits and Time Management Tips
FAQs
Okay, so what’s the deal with ‘three-point lighting’ anyway? Why is everyone obsessed?
Think of it as the holy trinity of lighting! It’s a fundamental technique using three light sources – a key light, a fill light. A backlight (also called a hair light or rim light). The key is your main light, defining the subject’s shape. The fill light softens the shadows created by the key. And the backlight separates the subject from the background, giving them that nice halo effect. It’s a versatile starting point for tons of different looks.
Key light, fill light… sounds straightforward. Where exactly should I put them in a university studio?
Generally, the key light goes to one side of your subject, slightly above eye level. The fill goes on the opposite side, lower and further away, so it’s less intense. The backlight goes behind the subject, often higher up, aimed at their head and shoulders. But experiment! Studio space varies wildly, so adjust based on the subject and the look you’re going for. Don’t be afraid to play with angles and distances!
What kind of lights are usually available in university studios. Which ones are best for three-point lighting?
You’ll likely find a mix – strobes (flashes), continuous lights (LED panels or hot lights), or maybe even some natural light. Strobes are powerful and freeze motion, great for portraits. Continuous lights are easier to see the effect in real-time, which is good for beginners. LEDs are cooler and more energy-efficient than hot lights. Any of these can work for three-point lighting; it’s more about controlling the light with modifiers (see next question!) than the light itself.
Modifiers, huh? Tell me more! What are they and why do I need them?
Modifiers are your best friends! They shape and control the light. Think softboxes, umbrellas, reflectors, grids. Snoots. Softboxes and umbrellas create soft, diffused light, perfect for the key and fill. Reflectors bounce light back onto the subject, filling in shadows subtly. Grids and snoots focus the light into a narrow beam, great for a dramatic backlight. Using modifiers is the key to going from harsh, unflattering light to a professional-looking setup.
How do I balance the intensities of the key, fill. Backlight? It always seems too bright or too dark!
This is where a light meter comes in handy, if your studio has one! But you can also eyeball it. Start with your key light at the desired intensity. Then, adjust your fill light to be about half as bright as the key – this creates nice, soft shadows. The backlight is usually lower in intensity than the key, just enough to create separation. Adjust these ratios to taste; there’s no single ‘right’ answer. Take test shots and check the histogram on your camera to make sure you aren’t clipping the highlights or shadows.
What about using colored gels? Can I incorporate those into a three-point setup?
Absolutely! Gels can add a ton of creative flair. Try using a slightly warm gel on the key light for a flattering skin tone, or a cool gel on the backlight for a dramatic effect. Be subtle at first – a little color goes a long way. And remember that colors affect each other, so experiment to see what looks best. Have fun with it!
Any common mistakes I should watch out for when starting out with three-point lighting?
Definitely! One big one is having the fill light too bright – it should fill shadows, not eliminate them entirely. Another is not positioning the backlight correctly; it should create a subtle rim light, not blast the subject with light from behind. Also, forgetting to flag (block) unwanted light spill can ruin your shot. And finally, don’t be afraid to break the ‘rules’ once you grasp them! Three-point lighting is a starting point, not a rigid formula.